Setup Guardian Node
This tutorial demonstrates how to set up a Guardian Node for the Babylon TestNet. For information regarding setting up nodes for a private network, refer to MOIPod CLI Docs.
- All Guardians Operators must be KYC verified to comply with the protocol's reputation requirements.
- Organizations can also become operators by completing the KYB verification.
- KYC verification for the MOI IDs is provided by select services such as IOMe which works with multiple vendors and agencies.
- Individual operators can host upto 21 Nodes, while Institutional operators can go upto 108.
Apply for the Guardian Waitlist
To become a Guardian Operator, you must first have a KYC-verified MOI ID and apply on the Guardian Waitlist with MOI Voyage to become eligible to register and start your node. If you already have a MOI ID (skip to Step 2) or if you already have a KYC ready MOI ID (skip to step 3).
- Step 1: Create MOI ID
- Step 2: Verify KYC
- Step 3: Apply for Waitlist
- Step 4: Register Guardian Node
Visit the IOMe Login Page, and create an account.
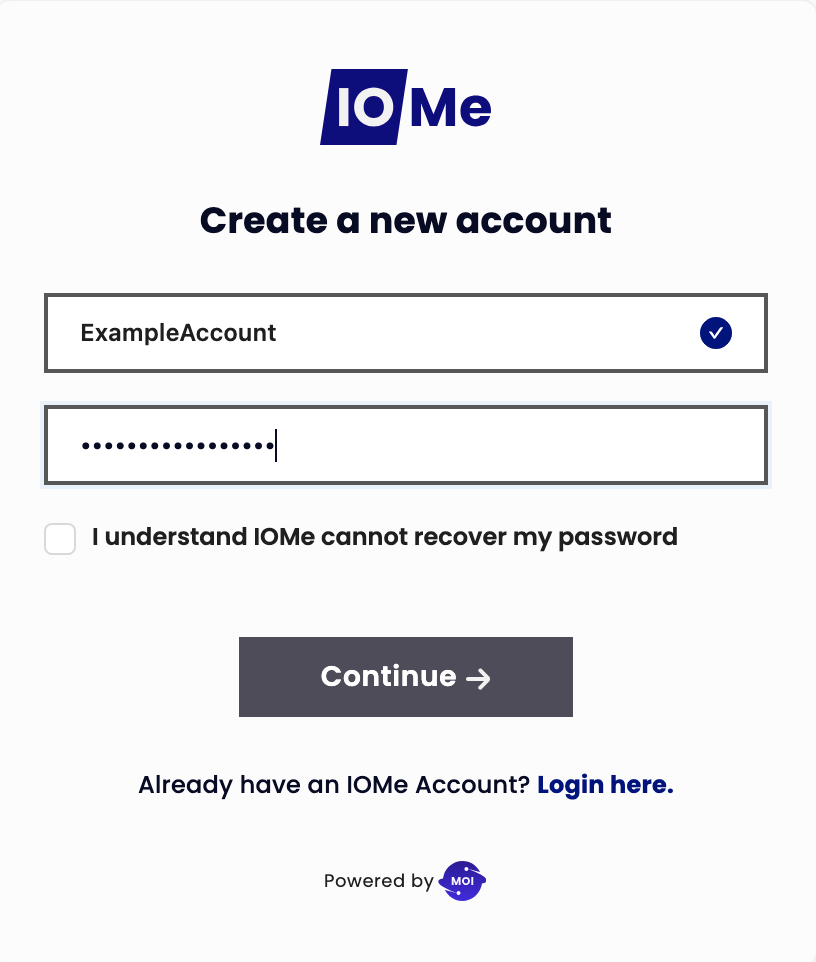
Choose a Username and Password. You will then be redirected to the Secret Recovery Phrase section.
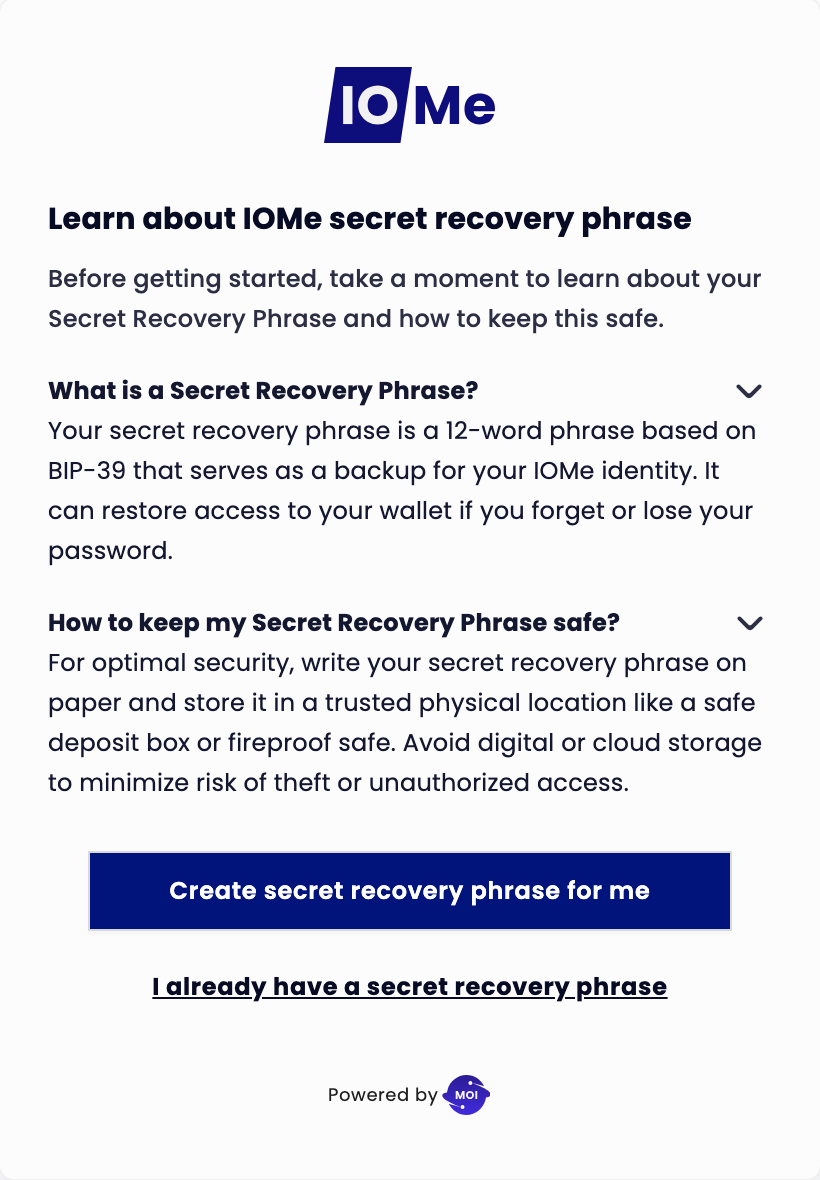
If you have an existing Secret Recovery Phrase, you can import and link it to your new IOMe account. Otherwise, IOMe will generate a new seed phrase for you.
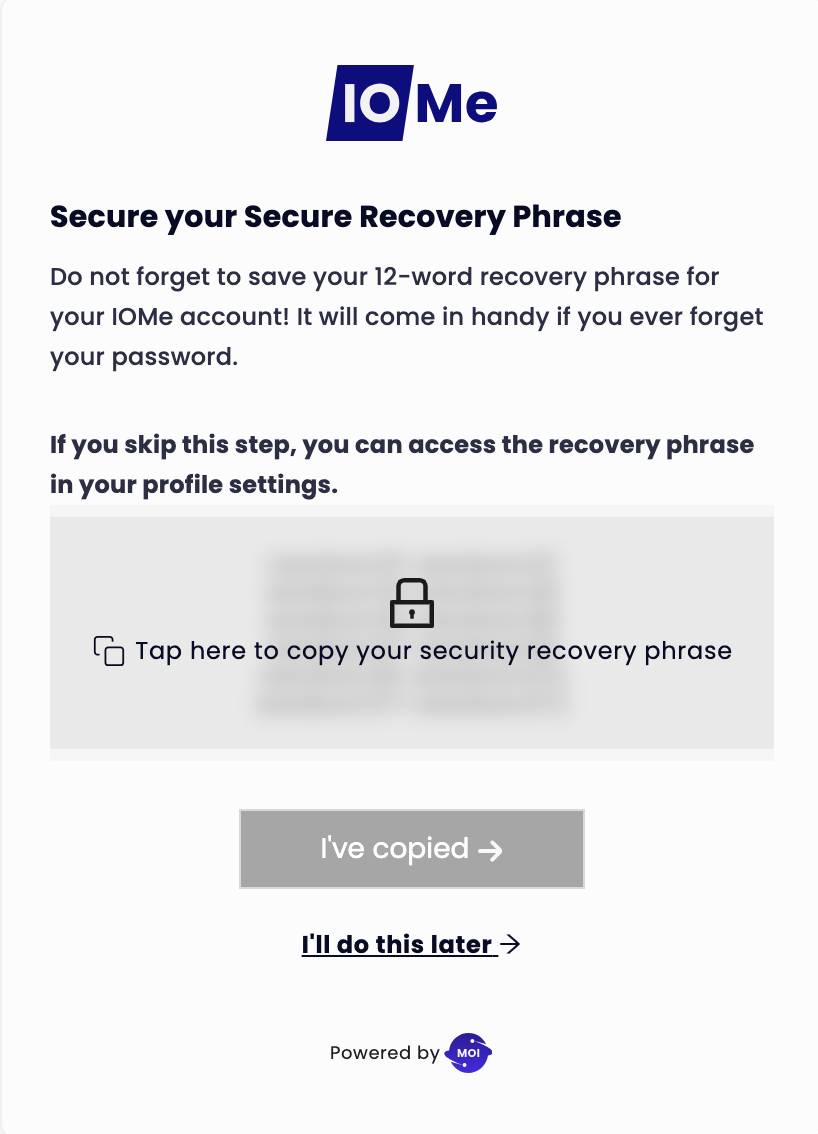
Please back up your Secret Recovery Phrase & IOMe Password. They cannot be recovered!
- Voilà! You now have an IOMe Account with a MOI ID.
Login to your IOMe Account and Find the Verify KYC/KYB Prompt on the top left
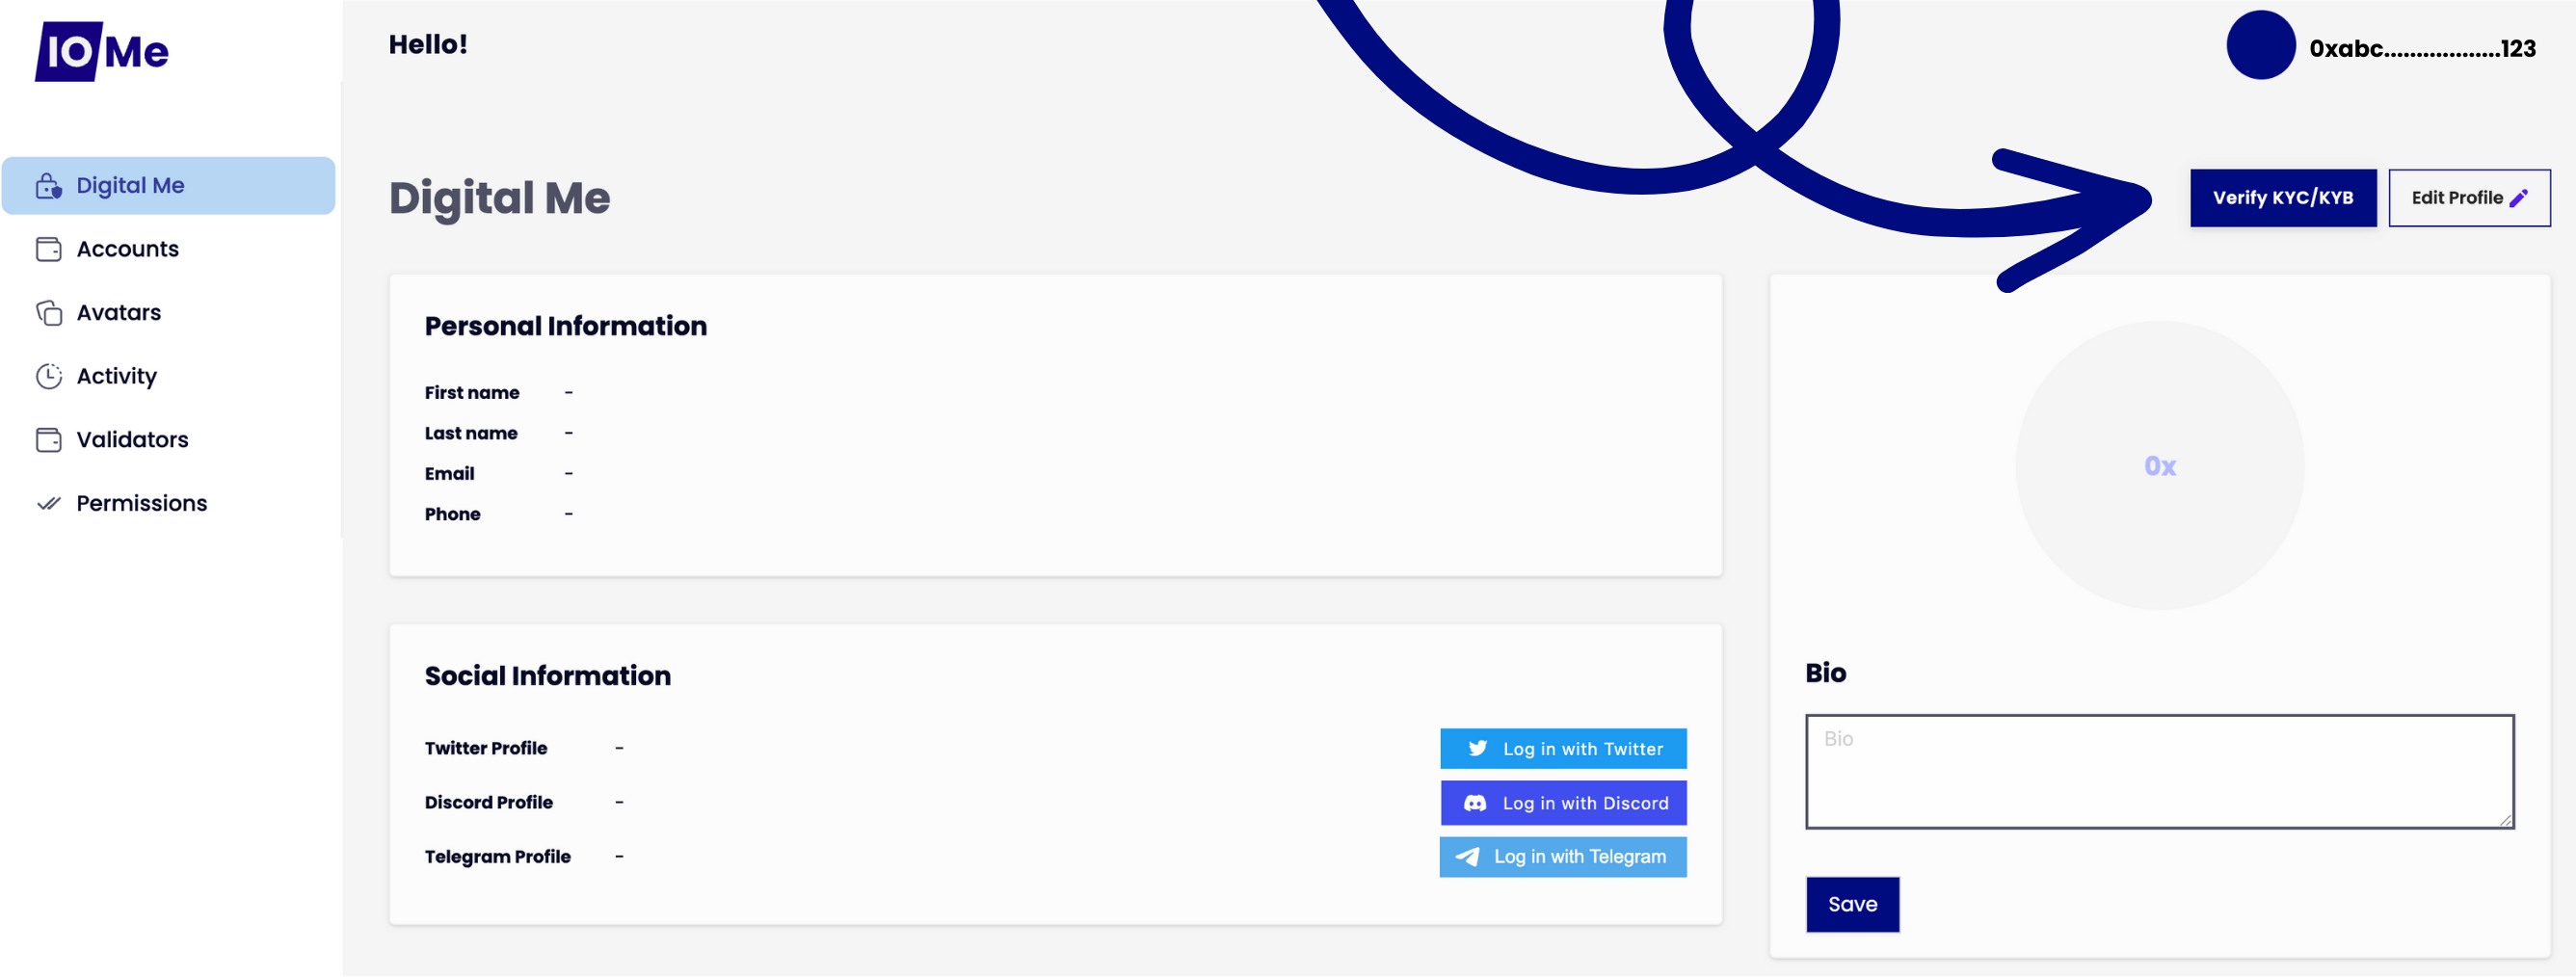
Choose whether the verification is for an Individual (KYC) or an Organization (KYB)
The KYC verification process involves 2 steps:
- Uploading Documents (Passport, Government Issued Identification, etc.)
- Completing the Face Scan
After completing the KYC process, the verification may take some time. Once verified, you can then use this account you just activated to log in and use MOI Voyage.
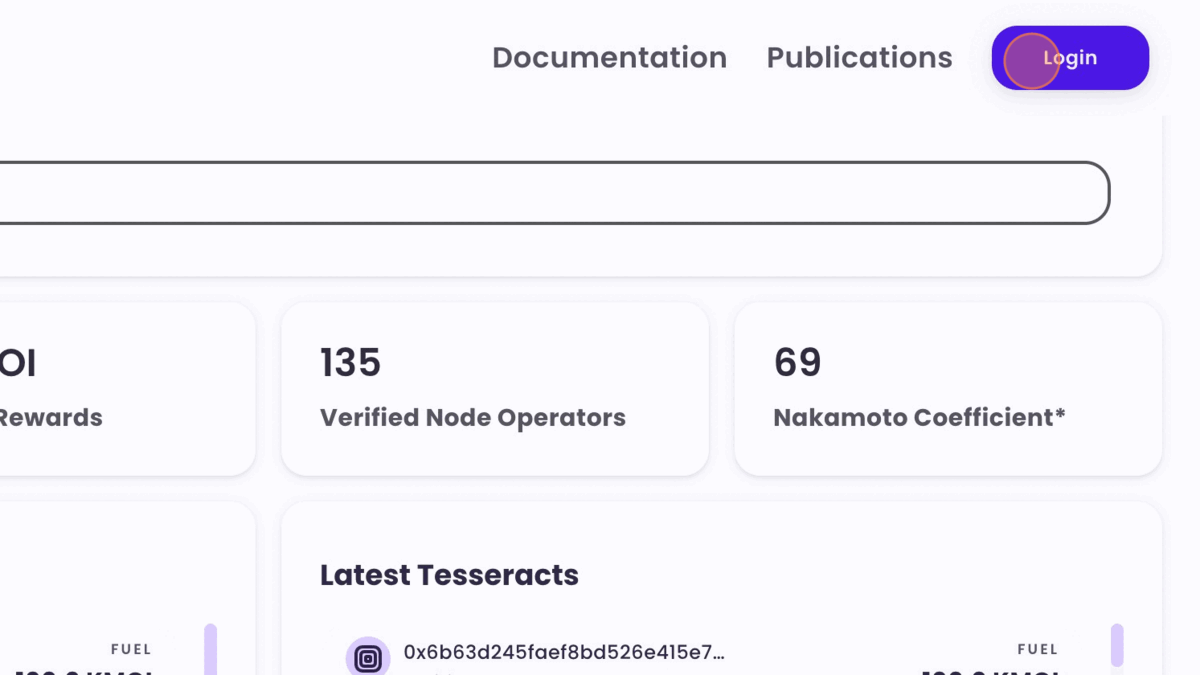
Visit MOI Voyage
Login into MOI Voyage using your KYC-verified IOMe Account.
Proceed to the Guardians page on the sidebar.
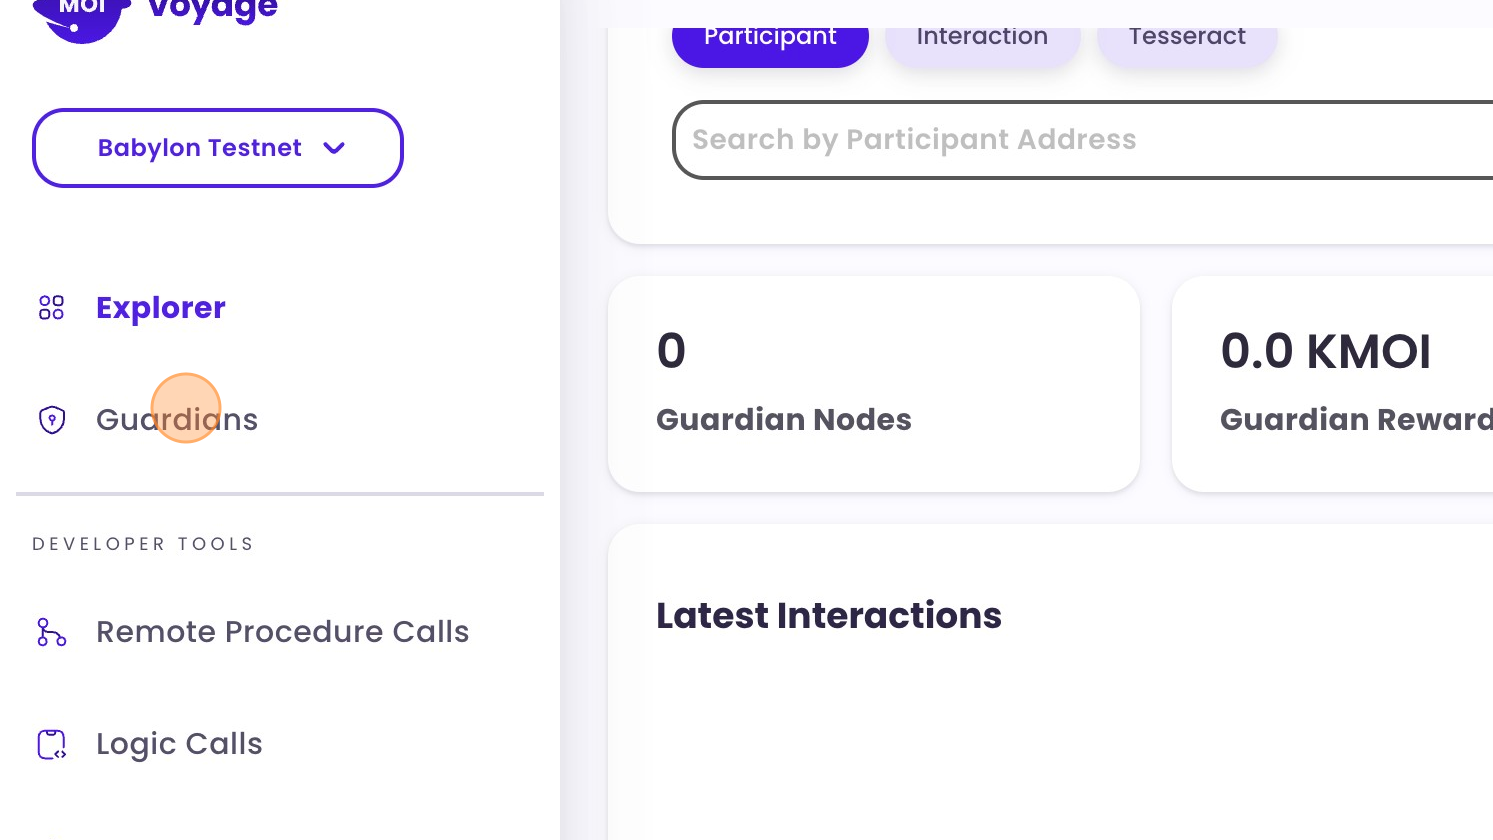
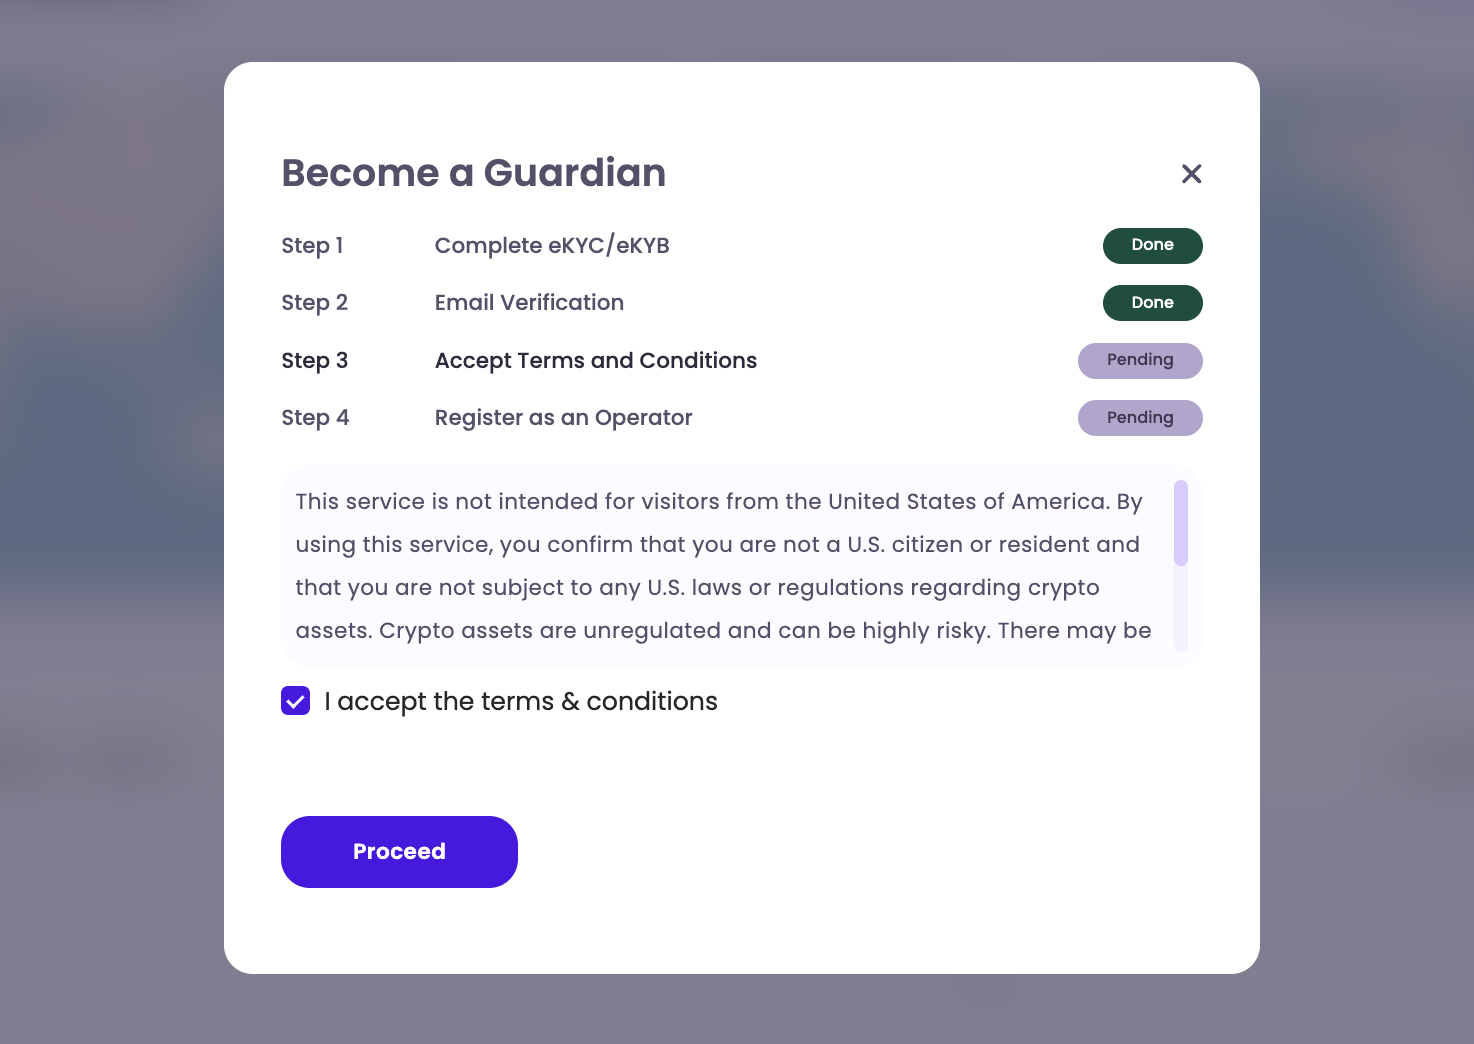
If you are already an operator you can skip this step. Otherwise, click on the Become a Guardian to register as an operator. Complete the required steps to register as an operator
Completing your KYC verification.
Validating your email address.
Accepting terms and conditions.
Register as operator.
Note: This process needs to be completed only once. Once you are an operator, you can register multiple nodes.
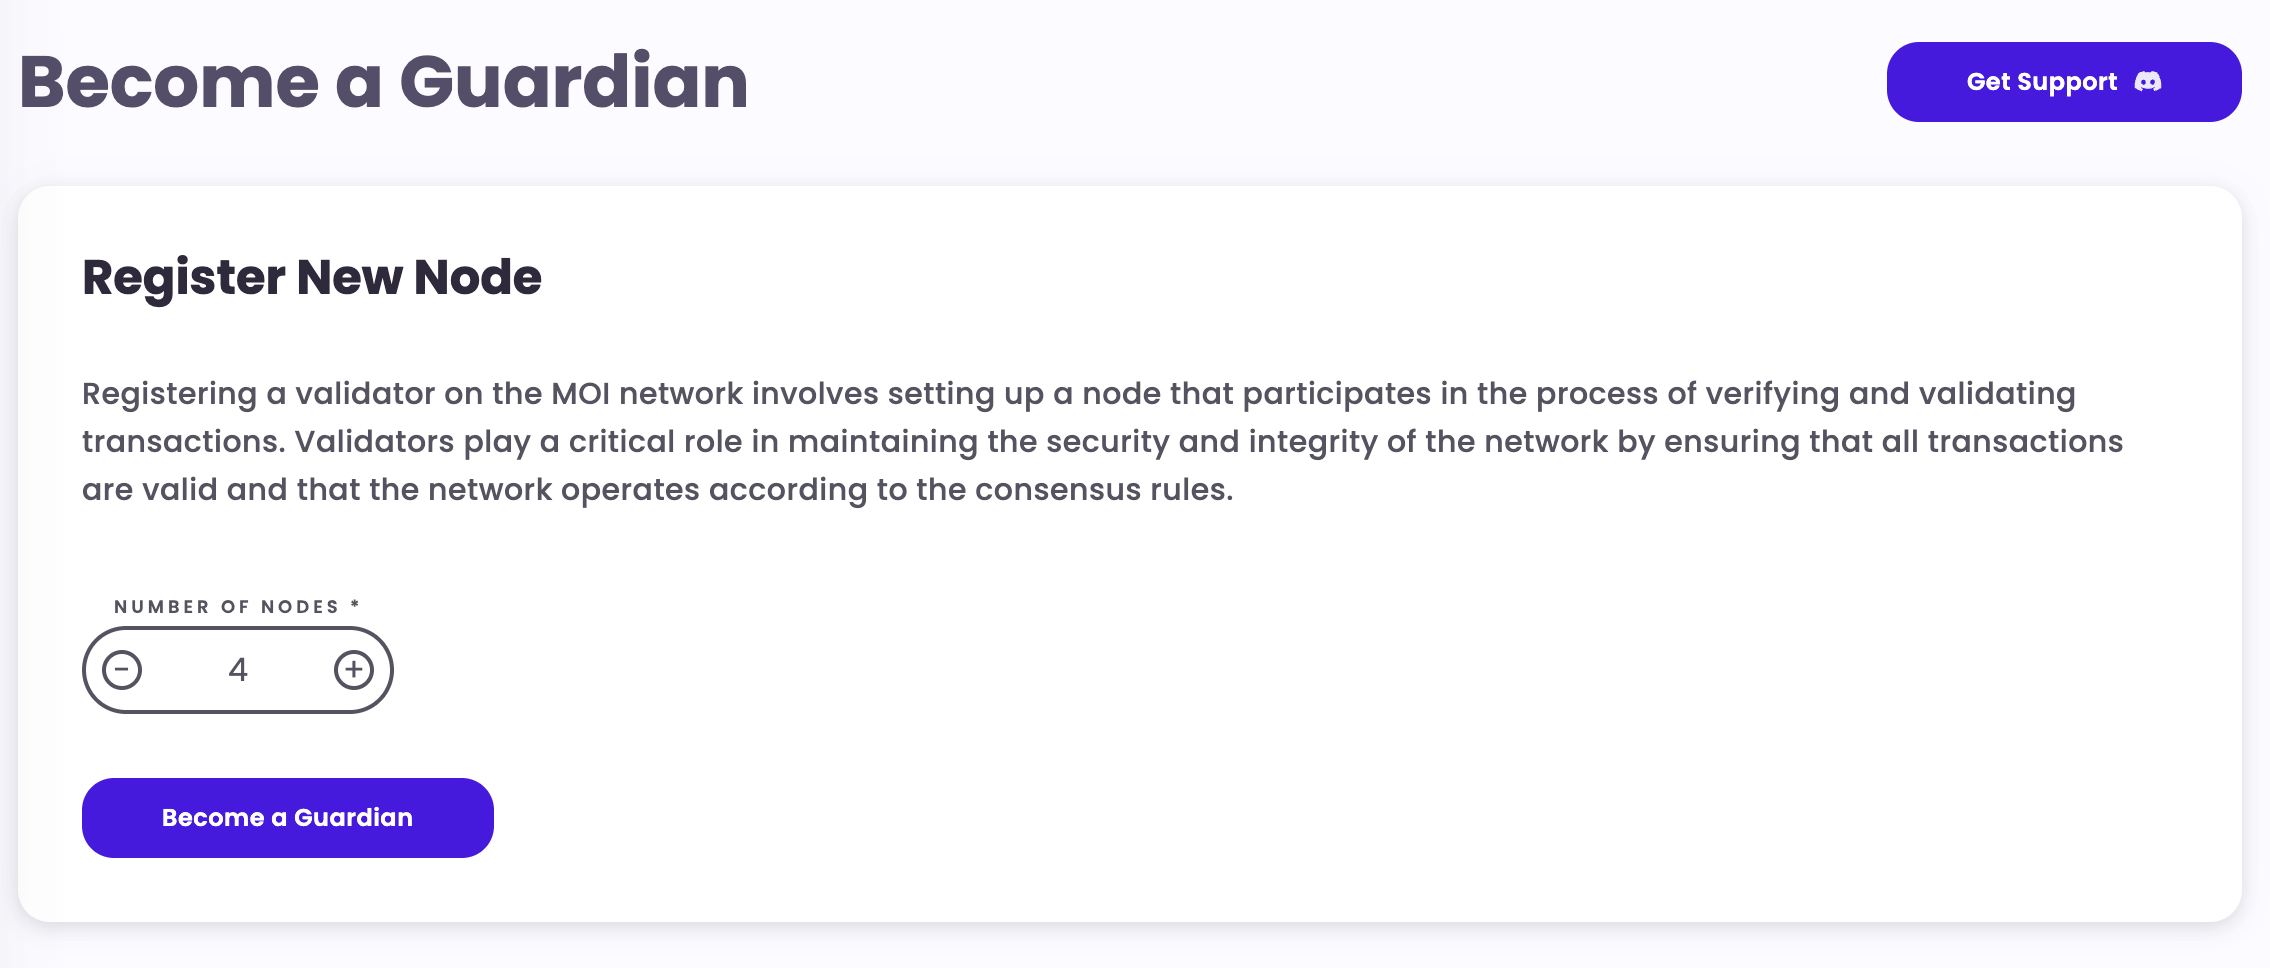
Click on the Become a Guardian button. This will redirect you to the Guardian application page where you can create desired number of nodes.
Once your node is approved, you can now register your node.
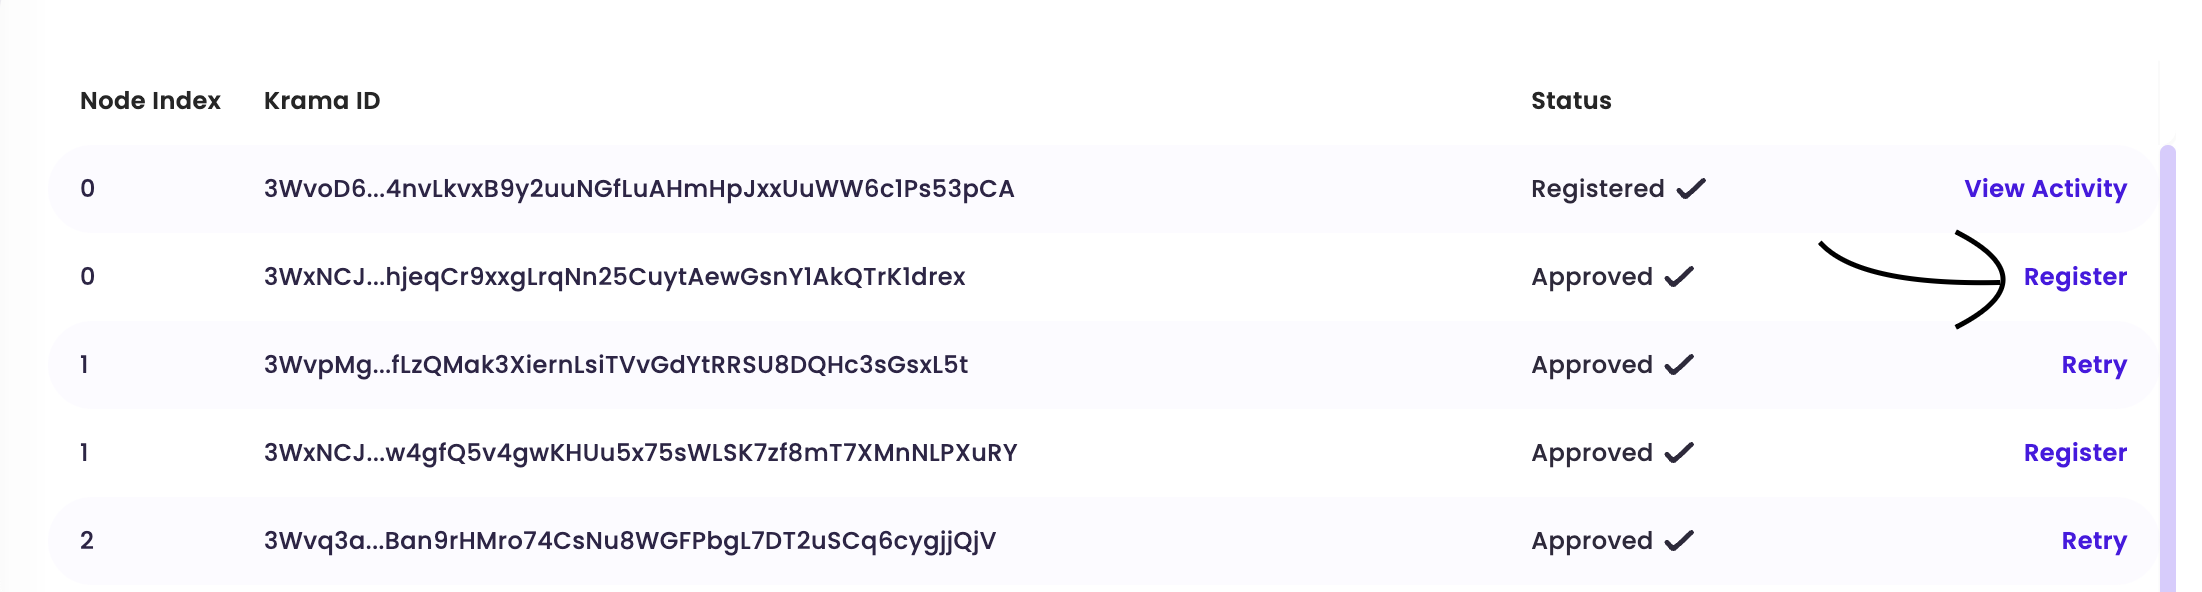
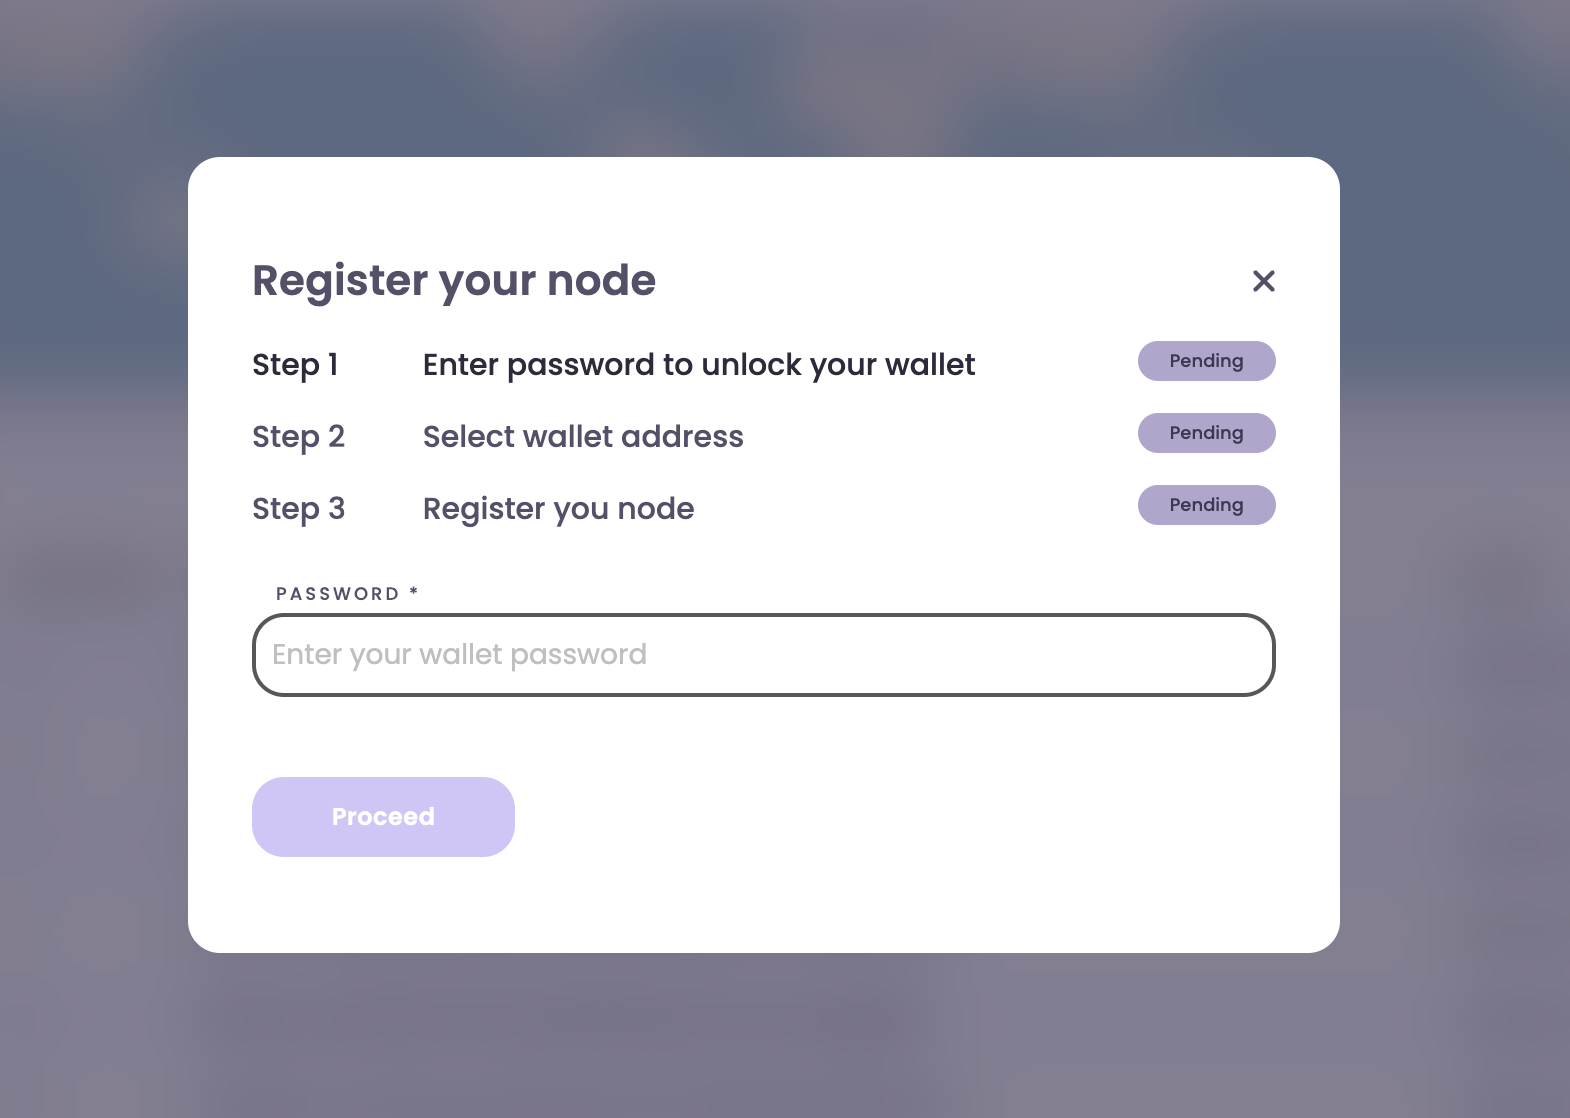
Next, click "Register". A modal popup will appear where the first step is to unlock your wallet.
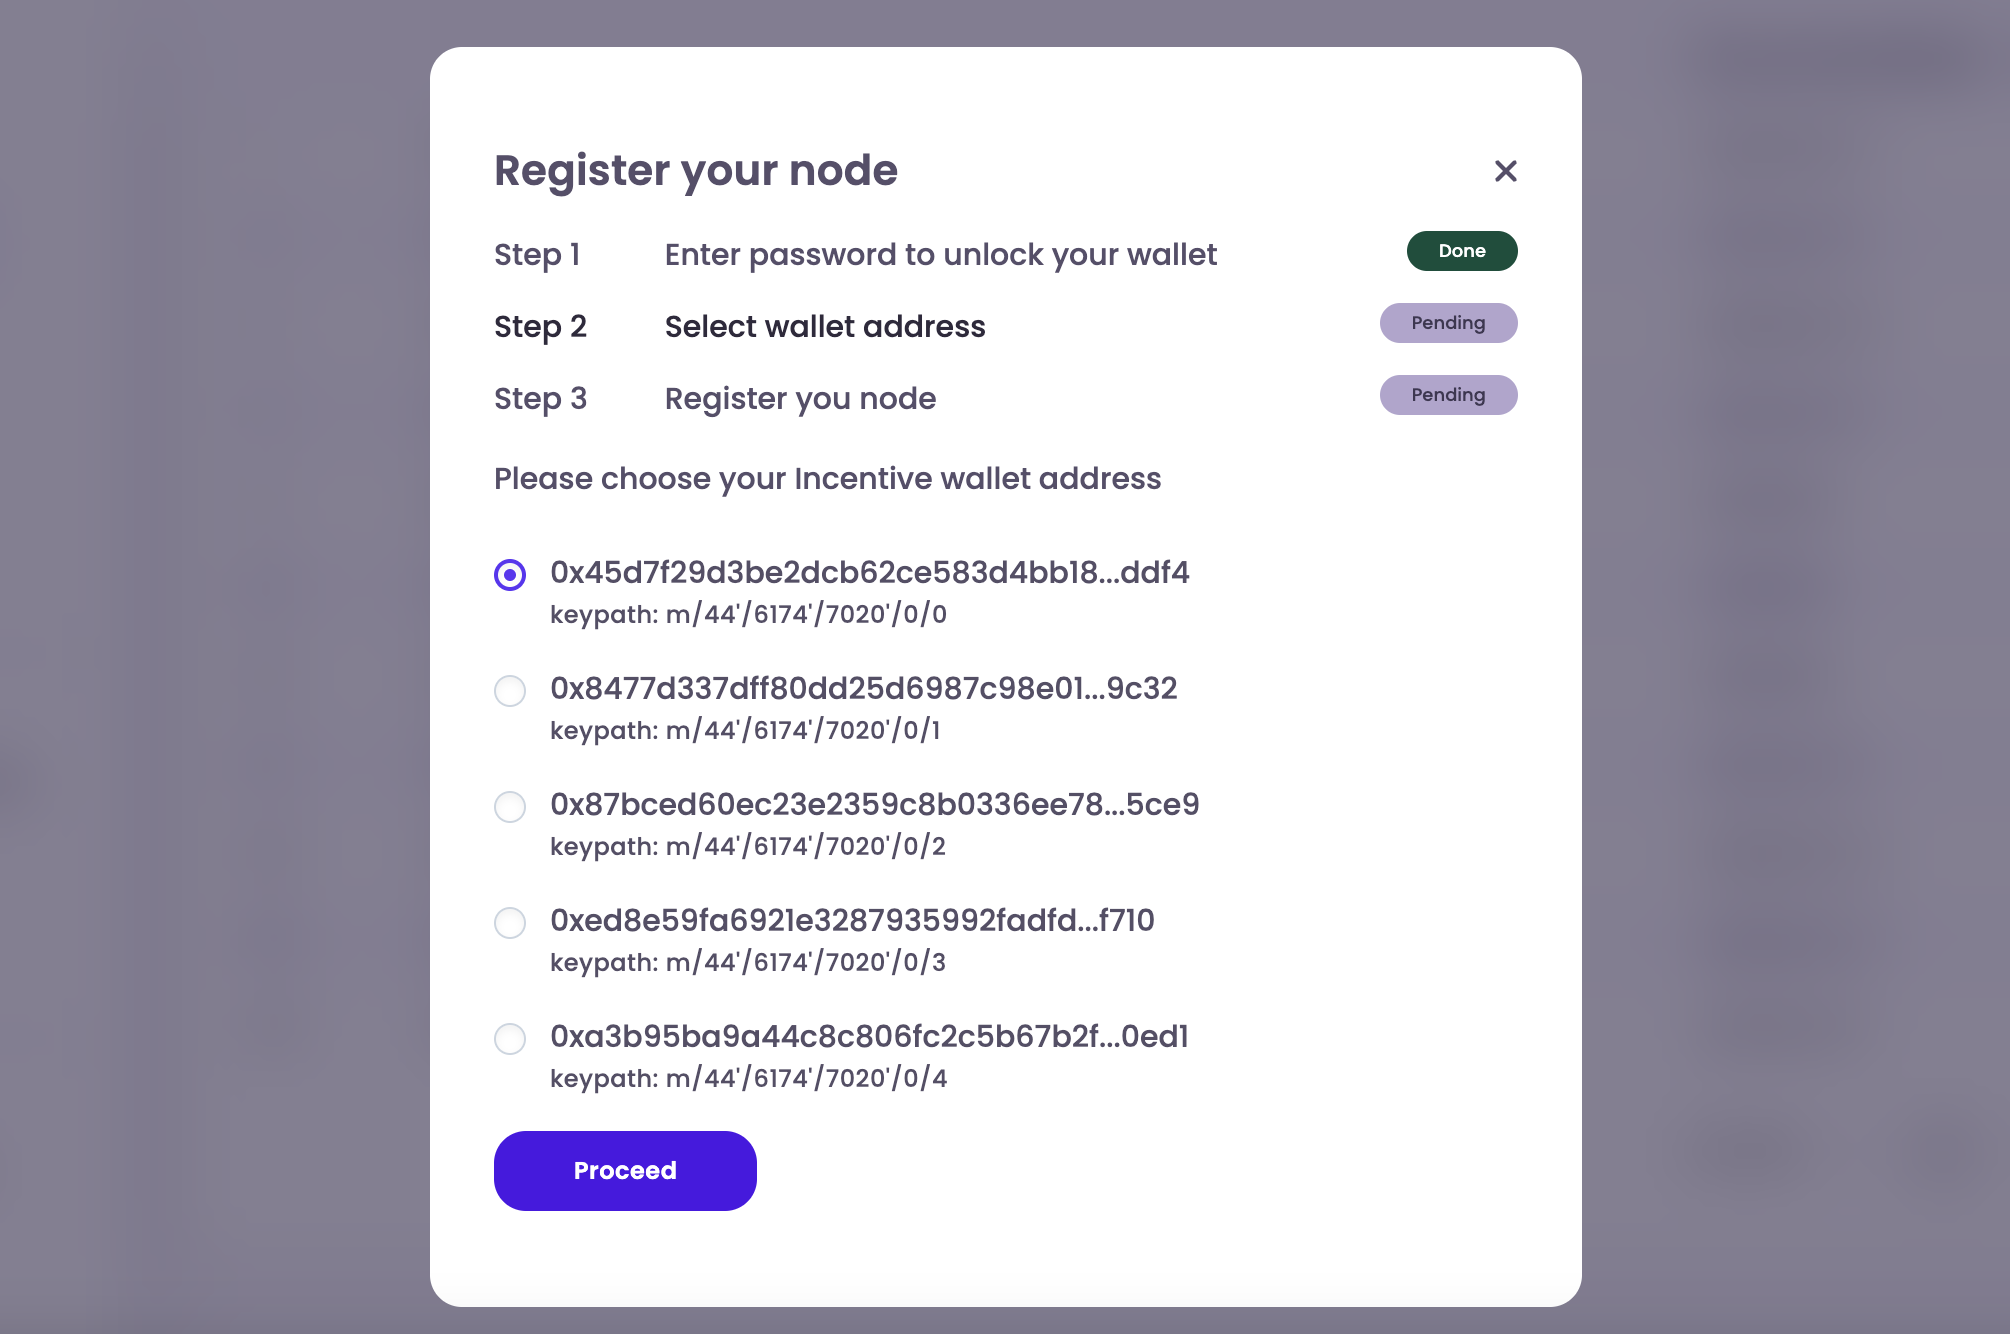
Next, select the account where you want to receive incentives. Click "Proceed" after you've chosen a wallet.
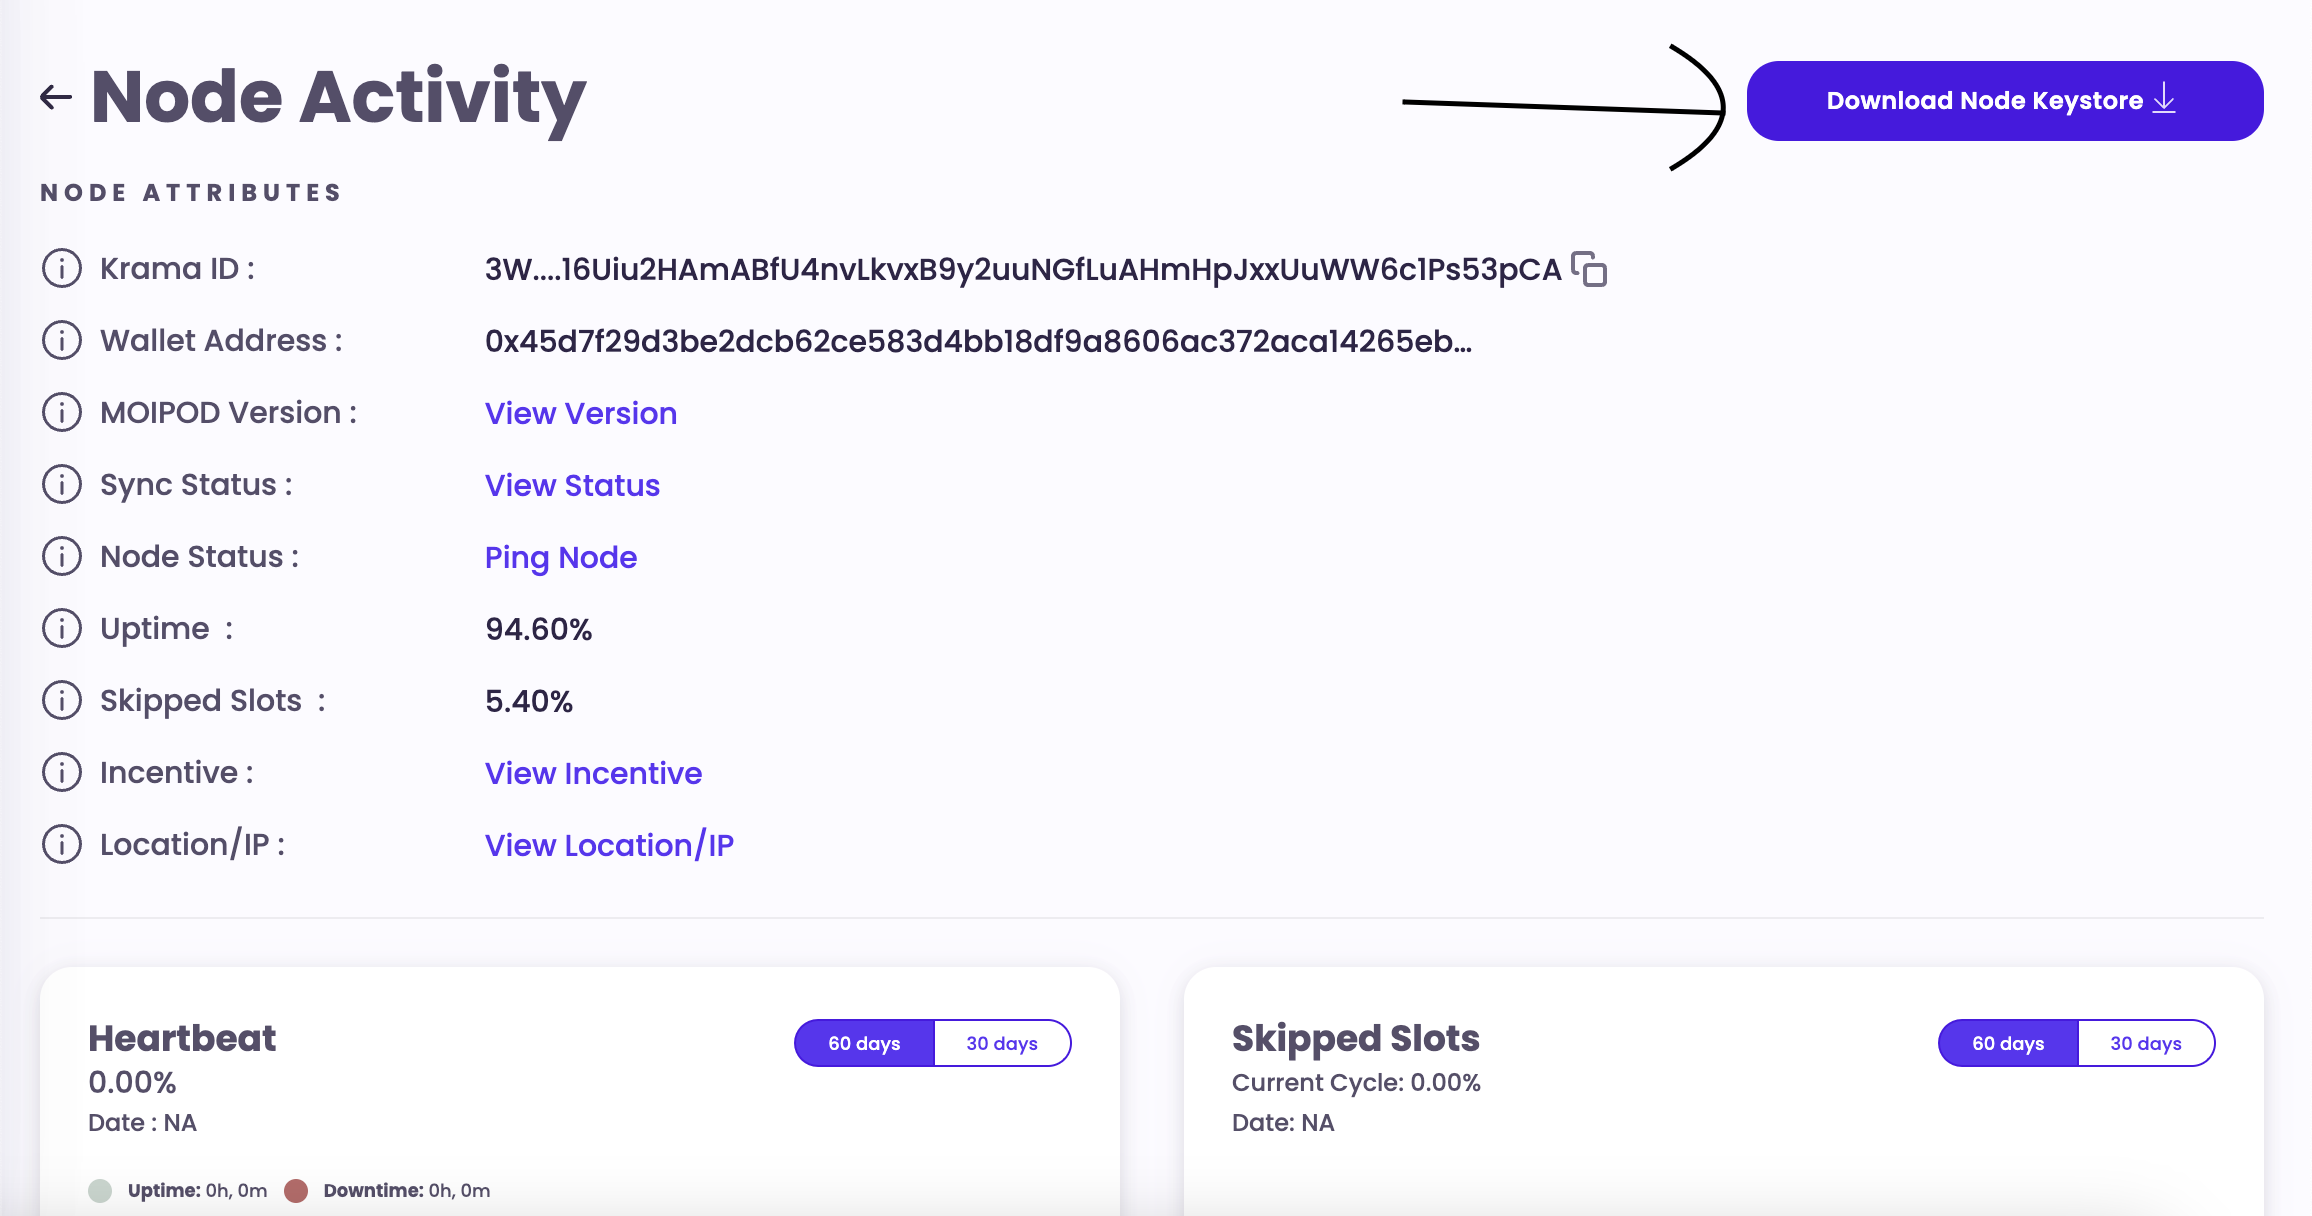
After successful registration, return to the activity page and click "Download Node Keystore" to get your keystore file, essential for starting your node.
Install MOIPod
To make the most of the Babylon TestNet, it's important to optimize your setup for performance and contribution. We suggest the matching the hardware specifications listed below for optimal results.
| Spec | Recommended |
|---|---|
| CPU | 4 Cores (ARM64 or x86-64) |
| RAM | 16 GB (DDR4) |
| SSD | 512 GB |
The MOI Protocol is highly network intensive and so, Guardians Nodes must have a reliable & steady internet connection with a speed of at least 500 Mbps. The average monthly bandwidth consumption is expected to be around 300-500 GB
Install Docker Desktop
In order to commence executing the docker commands, it is necessary to install Docker Desktop on our system. For guidance on installing Docker Desktop, please refer to the following links:
Once Docker Desktop has been successfully downloaded and installed, launch the Docker CLI and proceed.
Pull the MOIPod Docker Image
Using the following command will provide you with a pre-built image from the Docker registry. This image contains the necessary code and data for your node to communicate with the network and validate interactions in a seamless manner.
docker pull sarvalabs/moipod:latest
Connectivity Settings
The Guardian Node is configured to utilize the following network ports by default:
| Transport | Port | Reachability | Purpose |
|---|---|---|---|
| TCP/UDP | 6000 | Inbound/Outbound | Protocol P2P Interface |
| TCP | 1600 | Inbound | JSON RPC Interface |
In order to ensure the successful operation of the guardian node, it is imperative that the designated ports 6000 and 1600, are open as mentioned, along with the corresponding protocol.
If you opt against exposing the JSON-RPC port for external access, it is necessary to whitelist the WatchDog URL to ensure its ability to access the JSON-RPC port. Failure to whitelist this URL will result in non-crediting of your incentives.
Create a Data Directory
To set up your Guardian Node, start by creating a data directory that will store essential files for your node's operation. Run the following command to create a new data directory:
mkdir -p /path/to/data-directory
Replace /path/to/data-directory with your preferred directory path.
Next, copy your keystore file, which was downloaded from MOI Voyage, into the newly created data directory and name it keystore.json.
cp /path/to/your/keystore.json /path/to/data-directory/keystore.json
This keystore file is crucial for securely storing your node's credentials. Ensure it is named correctly as keystore.json in the data directory.
Start the Guardian Node
Using the following command provided below, you will initialize your personal Guardian Node, thereby enabling you to actively participate in the Babylon TestNet!
sudo docker run --network host --rm -it -d -w /data -v $(pwd):/data sarvalabs/moipod:latest server --babylon --data-dir {DIRPATH} --log-level DEBUG --node-password {NODE_PWD} --watchdog-url https://babylon-watchdog.moi.technology/add --network-rpc-url https://voyage-rpc.moi.technology/babylon
Custom Hostname or Port - If you are using a custom hostname or port, include the --local-rpc-url flag in the command. For example: --local-rpc-url http://13.235.63.184:1604 or --local-rpc-url http://node1.guardian.io.
Node Password - You can skip passing node password as a separate command-line flag if you have set it as an environment variable already.
Command Flags Reference Table
| Flag | Type | Description |
|---|---|---|
| data-dir | string | Path to the data directory in which you wish you to start the node |
| log-level | string | The logger level. Default: "INFO" |
| node-password | string | Passcode used to decrypt your node keystore. |
| babylon | bool | Connects to babylon network by downloading its genesis file. |
| local-rpc-url | string | Local node JSON RPC URL. This is provided if you are behind a relay or gateway node and this will be the URL that WatchDog will hit |
| network-rpc-url | string | To register you would need to fire an interaction to the network. So this is the network JSON RPC URL to which the interaction will be sent. |
| watchdog-url | string | WatchDog service url. WatchDog is used to monitors and incentives your nodes based on your availability |
Verifying Successful Startup of Node
Upon executing the above docker run command to start the node, you will receive a hash. This hash is used to verify if a Docker container started successfully. You can follow these steps to verify:
- Run the
docker ps -acommand to list all the containers. - Look for the container that you want to check by looking at the
Imagecolumn. TheImagecolumn will show the image that the container was created from. - If the container is running, it will have a status of "Up". If the container is not running, it will have a status of "Exited".
| Container ID | Image | Command | created | Status | Ports | Names |
|---|---|---|---|---|---|---|
| f00f11223344 | my-image | "/bin/bash" | 10 minutes ago | Up 10 minutes | 0.0.0.0:1600->1600/tcp | my-container |
In this example, the container with the ID f00f11223344 is running. Image that the container was created from is
my-image. The container was created 10 minutes ago and has been running for 10 minutes. To verify that the container
started successfully, we check if the Status column shows Up.
Accessing Node Logs
The log file for the Guardian Node can be accessed at the data directory of the node at {DATA_DIR}/log/{kramaID}
Artifacts
Genesis File
You can find the Genesis file by visiting the following link: Genesis File